Functional and Esthetic Rehabilitation of a Periodontally Compromised Patient with a Telescopic Prosthesis
MDT Volodymyr Madyudya
Determining an appropriate prosthetic treatment plan for a periodontally compromised patient can be challenging. The inflammation needs to be treated and monitored, and non-maintainable teeth have to be extracted. For the remaining teeth with moderate bone loss, a lasting prosthetic solution must be found. Fixed restorations and implants are risky on patients with a pre-existing periodontal infection with bone resorption. In this case, in order to extend the denture easily in the case of prospective tooth loss, the dentist chose a telescopic prosthesis in the upper and lower jaw. To provide the relatively young denture patient with a natural, age-appropriate and esthetic outcome, VITA Multi Functional Teeth (MFT) were used. The polymer VITA VM CC and the light-curing composite VITA VM LC were chosen to fit the teeth reliably onto the framework, in order to accomplish a perfect shade and chemistry match of the pre-fabricated teeth on the superstructure.
Clinical Situation
A 53-year-old female patient presented to the dentist with concerns about mobility in several teeth. The clinical examination and the probing showed obvious signs of gingival and periodontal inflammation, with severely increased pocket depth, especially at the lower incisors and the molar region. An orthopantomogram confirmed this clinical diagnosis. The bone loss at 18, 17, 16, 25, 26, 27, 28, 32, 31, 41 and 45 presented in such an advanced stage that those teeth had to be extracted (Fig. 1). The patient was provided with interim dentures during the healing period of the extraction sockets. An idealized wax-up and set-up was performed on these models to provide prosthetic and esthetic orientation during the entire treatment (Fig. 2).
Treatment and Technical Work
The preparation of all abutment teeth for the primary crowns was performed after wound healing (Fig. 3).
A silicone matrix of the planning wax-up and set-up provided guidance during the preparation and helped to ensure enough space for the superstructure and the final set-up during the incisal and vestibular reduction. Impressions were taken and working models fabricated in the dental laboratory. Based on these, the primary crowns were created in wax with parallel walls (Figs. 4-5). Lateral grooves were implemented in the proximal areas for the friction elements with Wirofix (BEGO, Bremen, Germany).
A shoulder was milled in the neck area before the wax crowns were sprued and embedded (Fig. 6). Casting took place with the resistant base metal alloy Wironit (BEGO, Bremen, Germany). The primary metal crowns were worked out roughly and fitted onto the master model, which was then protected with a rubber dam against metal chips during the milling procedure (Fig. 7). The walls of the primary metal crowns were parallel milled and finished by polishing meticulously (Fig. 8).
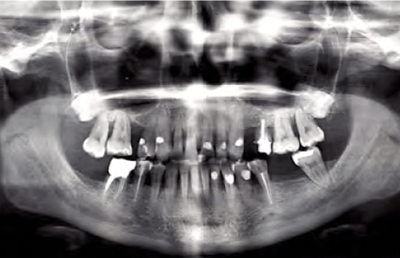
1. X-ray images presented several teeth with severe bone resorption, which had to be extracted.
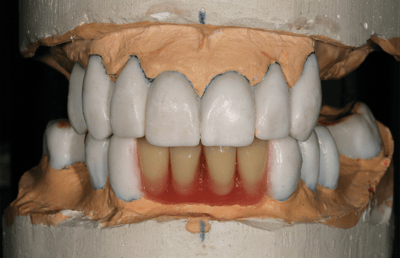
2. Wax-up and set-up were essential for planning and provided information on the dimensions in all of the fabrication steps.
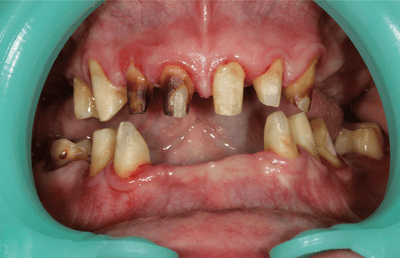
3. The remaining abutment teeth were prepared for the primary crowns.
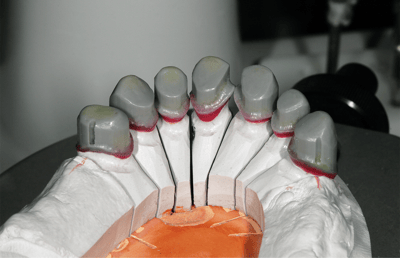
4. The primary crowns were modeled in wax with lateral grooves.
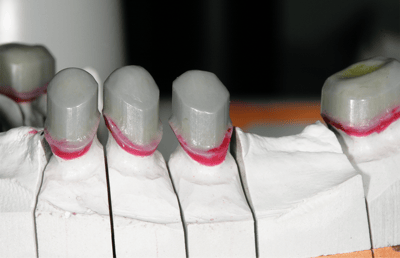
5. Parallel walls and shoulders were milled in all neck areas of the primary crowns.
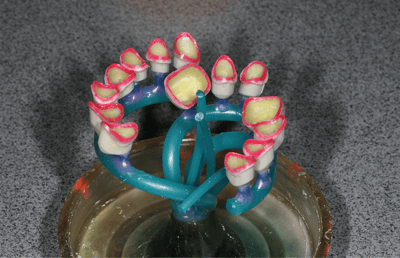
6. The primary wax crowns were sprued, embedded and cast.
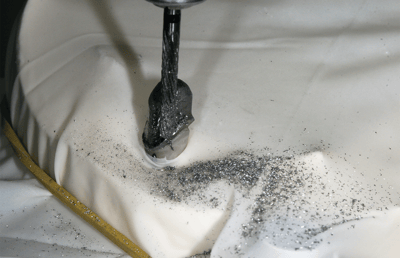
7. During the parallel milling of the primary crowns, the master model was protected with a rubber dam.
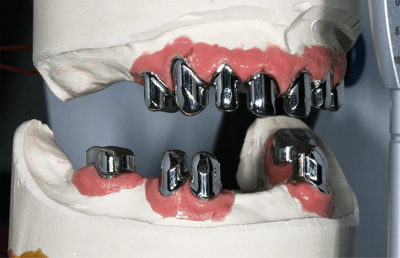
8. The finished primary crowns after meticulous polishing.
After a successful clinical try-in of the crowns and a first bite registration, a fixation impression was taken. New master models were fabricated with acrylic stumps, a silicone gingival mask and class four plaster. Secondary crowns were modeled directly on the primary crowns in wax, with insertion space for friction elements distally of 14 and 23. Fitting between primary and secondary crown was controlled and accomplished after the casting procedure (Fig. 9). Based on this, the tertiary framework was finally modeled with wax, according to the set-up dimension. The upper framework was fabricated in one piece (Fig. 10), and the lower framework in three separate parts in the molar and incisal areas (Fig. 11). All frameworks were cast and fitted on the master models before they were lasered onto the secondary crowns (Figs. 12-13).
The three elements of the superstructure were tried in clinically and a precise bite registration was performed with wax rims. Based on this, the existing master models were articulated. With the help of the silicone planning matrix, the set-up in wax was performed with VITA MFT. Shade accuracy was maintained, even if the teeth had to be reduced in a veneer-like manner in the framework areas. The integrated esthetic rules of shape and geometry of the front teeth allowed for an intuitive and easy set-up. In the molar region, the multifunctional occlusal surface design for every occlusion concept enabled an efficient and time-saving procedure.
The horizontal bite forces on the periodontally compromised remaining molars were able to be reduced without losing chewing functionality, due to the lingualized set-up. After the final clinical try-in, the set-up situation was fixed on the master models with stable plaster matrices. The frameworks were cleaned and the surfaces sandblasted with aluminum oxide 250 µm.
After cleaning and drying, Alloy Primer (Kuraray,Chiyoda, Japan) was applied. For the following steps, primary crowns and framework were repositioned on the master models. In order to mask the dark metal, VITA VM LC PRE OPAQUE (VITA Zahnfabrik, Bad Säckingen, Germany) was initially applied to the visible surfaces in even and thin layers. PRE OPAQUE, with its excellent light transmission, ensures a reliable bonding between the following veneering layers and the frameworks. VITA VM LC OPAQUE PASTE (Fig. 14) was applied to the surfaces and subsequently individualized with VITA VM LC PAINT in a second step (Fig. 15). Then the basal and circular areas of the VITA MFT teeth were sandblasted with 250 µm aluminium oxide to establish a micro-retentive surface. The cleaned teeth were repositioned in the plaster matrix with super glue and finally chemically conditioned with VITACOLL for optimized bond strength.
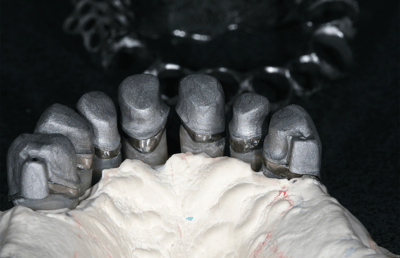
9. The secondary on the primary crowns.
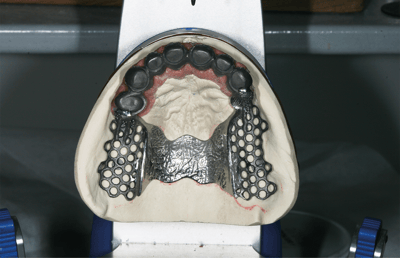
10. The fabricated secondary crowns with tertiary structure.
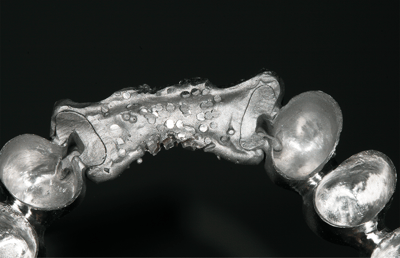
11. The framework for the lower jaw was fabricated in three pieces and then lasered together
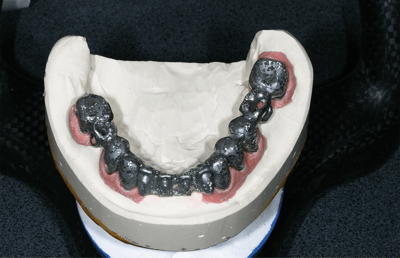
12. The framework in the lower jaw after the laser procedure.
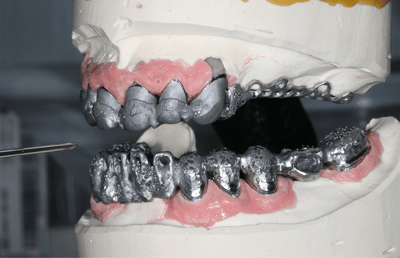
13. Primary crowns and frameworks in the articulator.
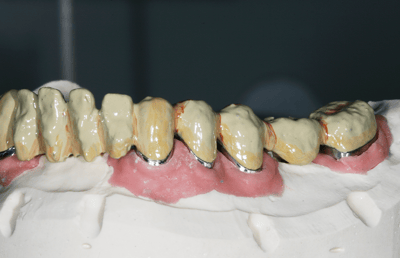
14. The framework was masked with VITA VM LC PRE OPAQUE and OPAQUE PASTE.
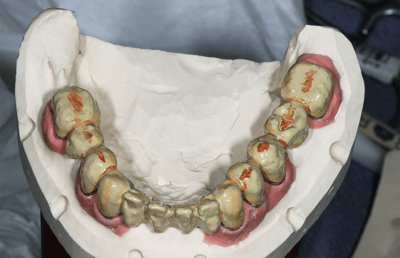
15. Individualization took place with VITA VM LC PAINT.
Cold polymerization of the VITA MFT teeth to the framework was carried out with VITA VM CC in the matching BASE DENTINE shade 2M2. The consistency of the manually mixed filler-free polymer allowed for a precise fixation of the pre-fabricated teeth to the frameworks. After the polymerization, the plaster matrices were removed and the dental morphology finalized with the light-curing and flowable veneering composite VITA VM LC flow. This composite offers a perfect shade match to VITA MFT and VITA VM CC and guarantees reliable masking. Its thixotropic material properties enable controlled modeling with the brush, according to the ceramic layering procedure. The vestibular gingival shields were also individualized. In order to receive a natural and three-dimensional outcome, different gingival shades of the composite veneering system were applied. After finalizing and polishing, the rehabilitations were ready to be inserted (Fig. 16). Then the primary crowns were cemented, cleaned and isolated intraorally, and the denture was placed during the final cement setting (Fig. 17).
Efficient, Shade-Accurate and Highly Esthetic
VITA MFT denture teeth, with their esthetic morphology and natural texture, ensured a very natural-looking and functional outcome. The anatomically layered teeth with different translucency levels from the cervical to the incisal area created a life-like smile. The shade accuracy between the polymer VITA VM CC and the veneering composite VITA VM LC flow lead to an efficient and uncomplicated match with the pre-fabricated VITA MFT teeth. In addition, the harmonized chemistry between the three components guarantees long-lasting rehabilitations. Thanks to the veneering material VITA VM LC flow in five gingival shades, the transition between the natural gingiva and the acrylic base in the upper jaw remained seamless, despite the patient’s high smile line (Fig. 18). The material also allowed for short and patient-friendly functional edges. The patient was very pleased with the overall esthetics of her final rehabilitations. VITA MFT provided the patient with an age-appropriate appearance, and an economical and highly esthetic, functional long-term solution (Fig. 19, 20, 21).
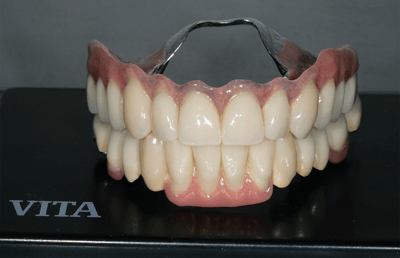
16. The finished telescopic rehabilitations after polishing.
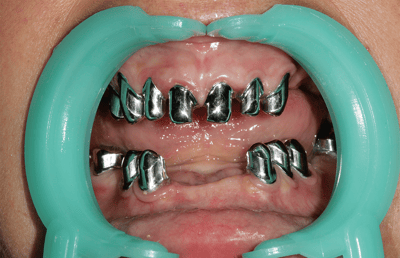
17. The integrated primary crowns after removal of cement residues.
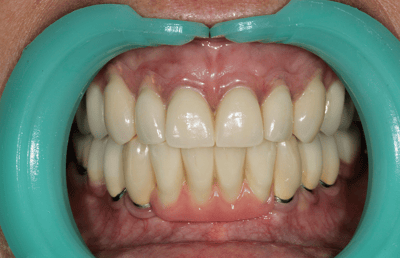
18. The individualization of the vestibular shield with VITA VM LC flow enabled a seamless transition.
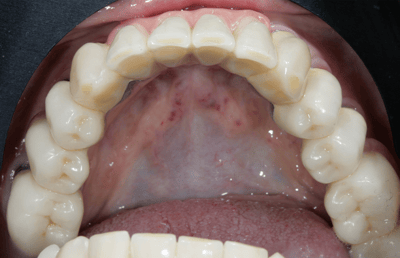
19. Occlusal view of the integrated telescopic denture in the lower jaw.
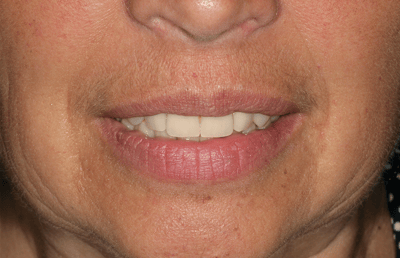
20. The patient’s lips and cheeks were stabilized with her new rehabilitations.

21. Despite the high smile line, the rehabilitations look very natural.
VITA Zahnfabrik H. Rauter GmbH & Co. KG
Spitalgasse 3
79713 Bad Säckingen
Germany
Phone: +49 7761 562 0
Hotline: +49 7761 562-222
E-Mail: info@vita-zahnfabrik.com
Contact GTB Data protection Imprint
©2026 VITA Zahnfabrik. All rights reserved.


